


Learn How to Mask in Figma Following These Simple Steps
Learn How to Mask in Figma Following These Simple Steps
May 1, 2023
Updated:
May 1, 2023
Featured & Recent Articles


.webp)


Layer Masking is a very effective way to control the visibility of some specific areas of any layer. Figma equips designers with various masking methods. In this branding Greenville NC tutorial, I will explain the basics of layer masking in Figma and share an example displaying several manners of how to mask in Figma.
How to Mask in Figma - Standard Mask
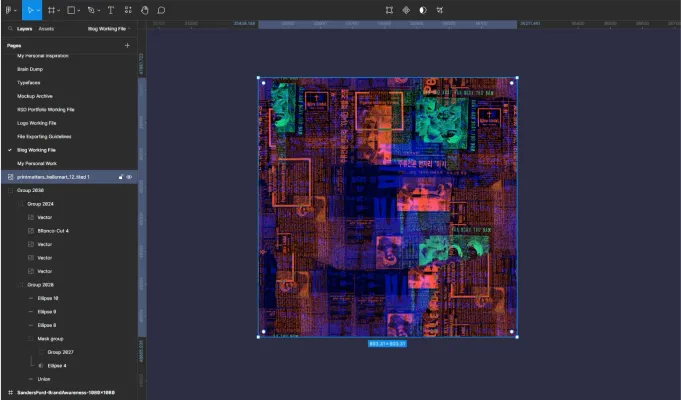
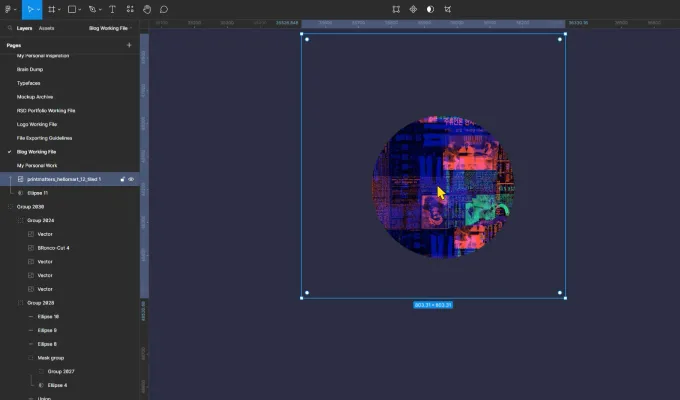
1. Start by placing an image onto your Artboard.
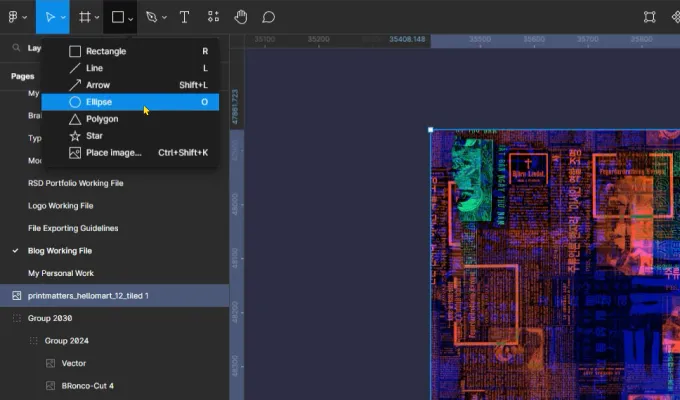
2. Next, navigate to the top left of your window and locate the ellipse tool, or press ‘O’ to create a circle.
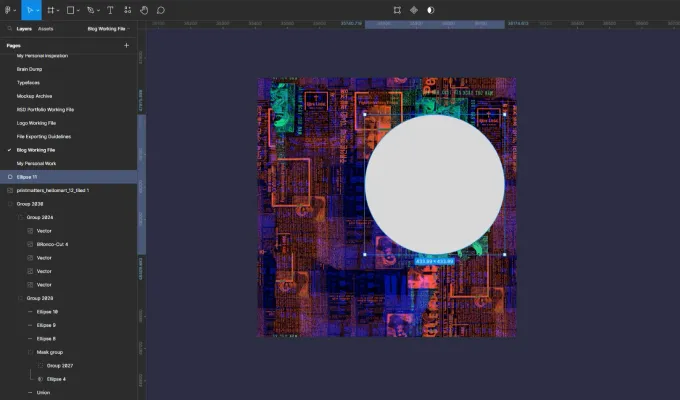
3. Now place the circle over your image. Be sure to place the shape over the areas you want visible.
4. With your circle selected, hold ‘CMD’or’Ctrl+[’ to send it directly behind your image.

5. Navigate to the Mask icon, or use the Mask hotkey ‘Cmd+Alt+M’ or ‘Ctrl+Alt+M.’
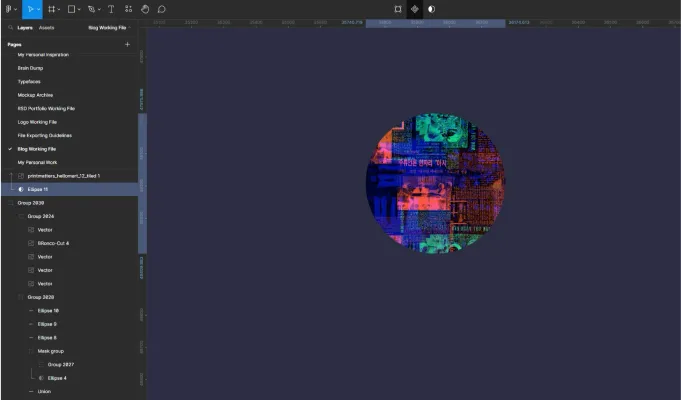
6. Fine-tuning your placement is simple when learning how to mask in Figma. Direct select your image by holding ‘CMD’ or ‘CTRL’ and selecting the image in your mask.
Learning how to mask in Figma is simple! In addition to creating standard masks in Figma, the tool allows you to layer additional features to take your design up a notch. Read on to learn how to mask in Figma with a soft glow effect.
How to Mask in Figma with a Soft Glow Effect
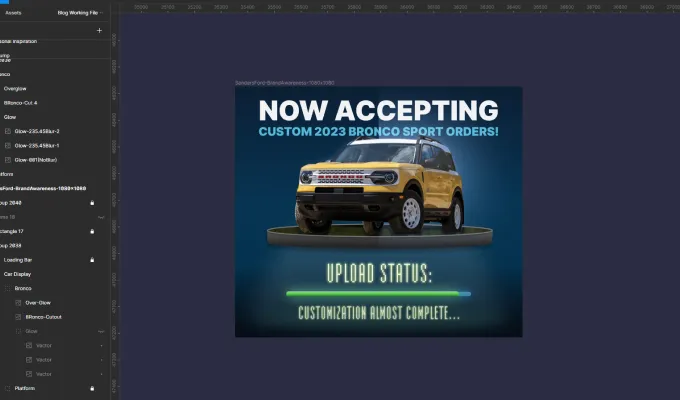
Since we have covered the basics of how to mask in Figma, I thought I would show how masking allowed me to create a soft glow behind this Ford Bronco. This mask allows the soft glow to sit behind the Bronco while resting on the platform beneath the car.
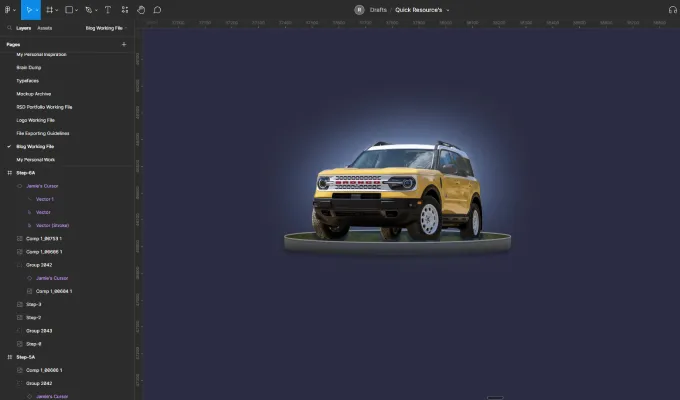
The mask is a vector shape of the Bronco that I created using “Image Trace” in Adobe Illustrator, and pasted into Figma so that I could start applying effects.
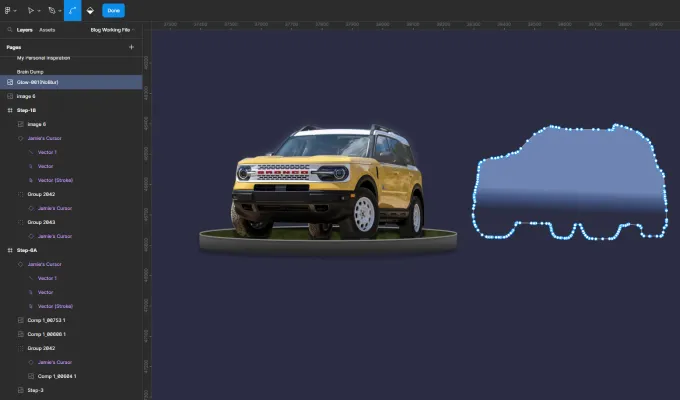
Besides playing with the blending mode, the main effect utilized in the design of this asset is Figma’s “Layer Blur.” I started with a very light value but ended up raising it all the way to 235.45.
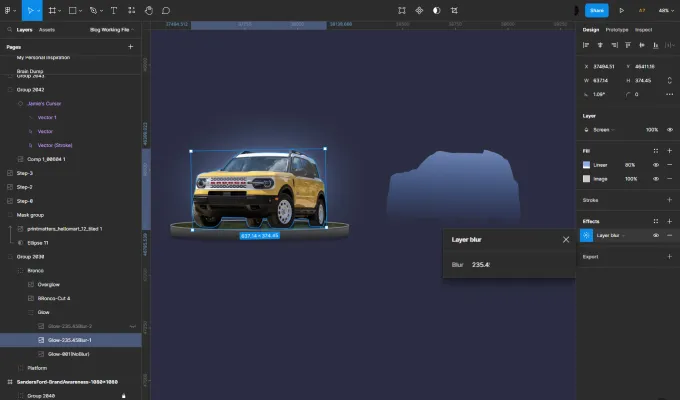
After adjusting the original Glow layer, I duplicated it to increase the range of the residual glow. I avoided increasing the “Layer Blur” value to protect the definition of the glow effect. Below is the final iteration of this particular asset, which is the main feature of the final design.

Here’s a split view of the final ad design to demonstrate the type of glow I wanted to achieve.
Learning how to mask in Figma is key to better understanding the platform. After this walkthrough, I believe you will find countless ways to incorporate its use in your next design and further strengthen your design toolkit!
Learn How to Mask in Figma and Other Great Tutorials on Our News Page
Red Shark Digital invests in our branding Greenville NC experts. Your small business can, too! With years of experience creating quality assets, graphics, and other creative services, we are here to show up and show out for your business. Visit our website or contact us today to learn more about how our design and brand identity professionals can transform the look of your business.
One Focus:
Keeping You Up To Date.
Digital marketing news delivered to your inbox without the fluff...Maybe a little fluff....The cute kind 🐶!
