


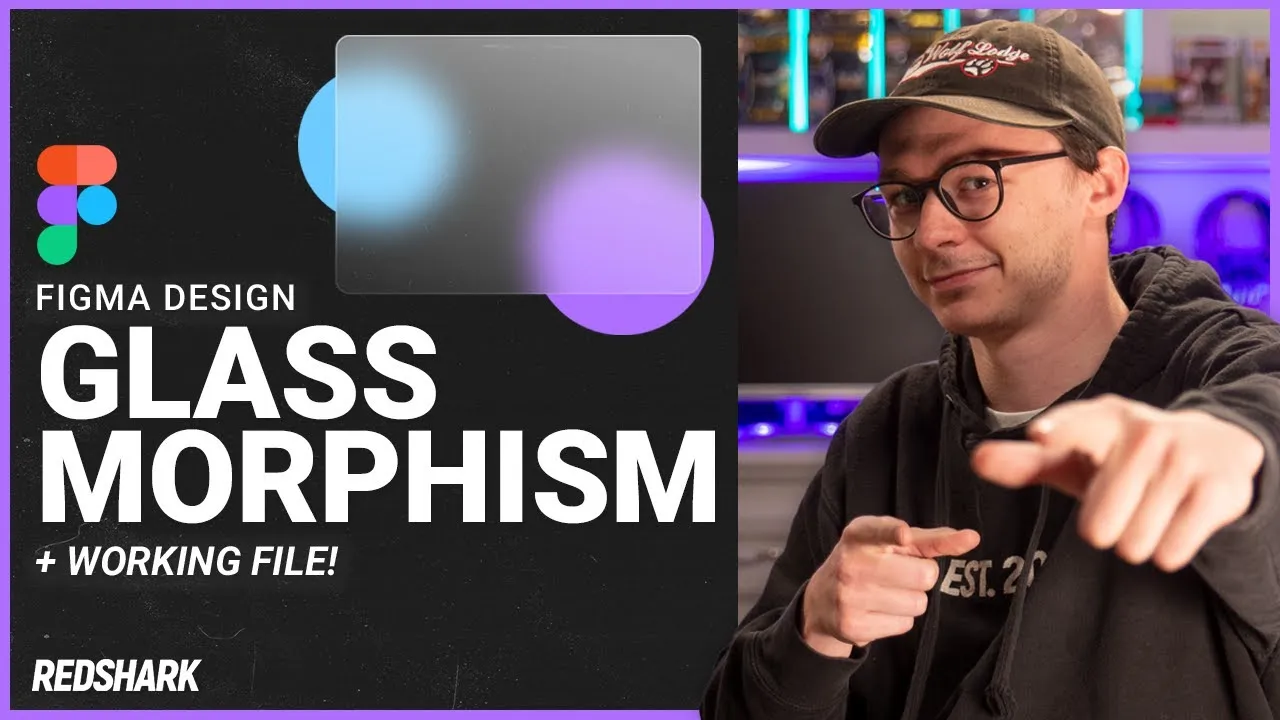
How to Create Glass Effect in Figma | RSD Tutorial (+ Working File)
How to Create Glass Effect in Figma | RSD Tutorial (+ Working File)

May 1, 2023
Updated:
May 1, 2023
Featured & Recent Articles


November 12, 2021
Updated:
May 1, 2023
How to Create Glass Effect in Figma | RSD Tutorial (+ Working File)
I’m sure you’ve seen this new trend once or twice throughout recent designs. Have you ever wondered how to create glass effect in Figma for yourself? Well, look no further because we’ve got you covered! Follow along with this blog - or, if videos are your thing, check out our YouTube video and work alongside our designer as he breaks down step-by-step how to create glass effect in Figma. Figma makes creating these glass panes super simple; however, if this is your first time using Figma, it may be challenging to navigate. Our graphic design Greenville NC team includes a few tips in this tutorial to get you started on the right foot.

Step One: Draw a Rectangle
It’s that simple to start learning how to create glass effect in Figma. Select your rectangle tool from the top of the screen to create a square inside your file. On the right, you’ll see its specific dimensions. In this tutorial, our graphic design Greenville NC expert set their rectangle to be 500 pixels wide by 350 pixels tall. Add a corner radius of 20 to this rectangle to remove those sharp 90-degree corners. The fill color doesn’t matter at this step.

Step Two: Apply Gradient
The next step in how to create glass effect in Figma involves applying a linear gradient to the rectangle. On the right side of your screen, notice the shape fill. The default option is a solid color. From the color picker, change the drop-down to Linear instead of Solid. Starting from the top left corner and moving down to the bottom right corner, we want to apply a subtle gradient that starts with a fill of #EFEFEF at 60 percent opacity that changes to the same fill color but at eight percent opacity.

Step Three: Add Background Blur
Besides step one of how to create glass effect in Figma, this might be the easiest part of the whole process. For this step, simply select your rectangle and add an “effect” from the right side of your screen. “Drop Shadow” is the first to apply by default. Click the drop-down and change the effect to "Background Blur." Our graphic design Greenville NC professional is setting their intensity to 55 percent, but you may find that changing this percentage may be helpful depending on how you plan to use the glass pane. Don’t worry, this setting can always be changed later. You’re probably wondering now, “Did anything even change?” The short answer is yes. But you won’t see the results for another few steps.

Step Four: Add a Stroke
Now that the rectangle has a blur, it's time to give the glass pane and edge. Our graphic design Greenville NC expert achieves this by adding a linear gradient stroke set to the inside at a thickness of two. The settings, direction, and color values should have identical dimensions to the original rectangle. With this stroke, notice that your rectangle has more depth. It should appear to look more like real glass!

Step Five: Our Final Step
In our final step for this tutorial on how to create glass effect in Figma, our graphic design Greenville NC specialist will add elements behind the rectangle. Our creative services Greenville NC professionals recommend adding several randomly colored circles to the background of the original rectangle. To truly sell the effect, try letting some elements fall behind the glass and to the side of it. You’ll instantly notice that the background blur we added in step three is what creates the frosted glass technique within the area of our original rectangle.
Red Shark Digital | Creative Services Greenville NC
Now you’re done! Our graphic design Greenville NC team recommends resizing the rectangle, adding or removing shapes from the background, or changing your glass color within the gradients we made in steps two and four. This tutorial is so easy that once you’ve done it, you’ll want to keep creating glass elements for all your graphic design Greenville NC needs! Are you looking for more valuable resources from our creative services Greenville NC agency? Visit our News page and subscribe to our Red Shark Digital YouTube channel for a catalog of graphic design Greenville NC tutorials. Did this tutorial on how to create glass effect in Figma help you discover a new skill? Be sure to share your designs with us on social media, and tag us!
One Focus:
Keeping You Up To Date.
Digital marketing news delivered to your inbox without the fluff...Maybe a little fluff....The cute kind 🐶!
